Note
Go to the end to download the full example code.
2d and 3d Probes
This example shows how to manipulate a probe in 2d or 3d.
Import
import numpy as np
import matplotlib.pyplot as plt

from probeinterface import Probe
from probeinterface.plotting import plot_probe
First, let’s create one 2d probe with 24 contacts:
n = 24
positions = np.zeros((n, 2))
for i in range(n):
    x = i // 8
    y = i % 8
    positions[i] = x, y
positions *= 20
positions[8:16, 1] -= 10

probe_2d = Probe(ndim=2, si_units='um')
probe_2d.set_contacts(positions=positions, shapes='circle', shape_params={'radius': 5})
probe_2d.create_auto_shape(probe_type='tip')
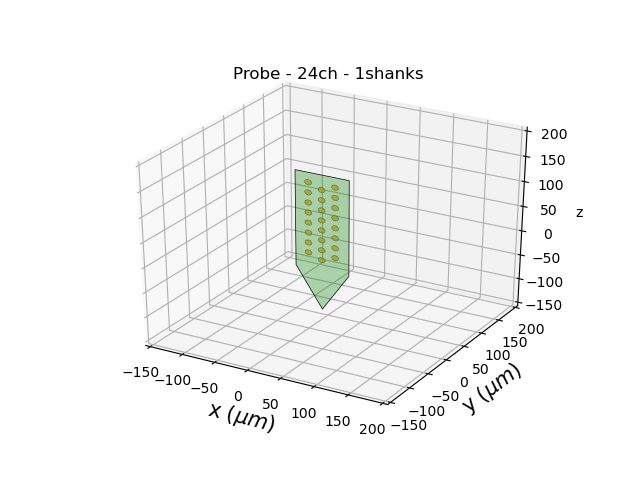
Let’s transform it into a 3d probe.
Here the axes are ‘xz’ so y will be 0 for all contacts. The shape of probe_3d.contact_positions is now (n_elec, 3)
probe_3d = probe_2d.to_3d(axes='xz')
print(probe_2d.contact_positions.shape)
print(probe_3d.contact_positions.shape)
(24, 2)
(24, 3)
Note that all “y” coordinates are 0
df = probe_3d.to_dataframe()
df[['x', 'y', 'z']].head()
The plotting function automatically displays the Probe in 3d:
plot_probe(probe_3d)
(<mpl_toolkits.mplot3d.art3d.Poly3DCollection object at 0x7d7b049c5540>, <mpl_toolkits.mplot3d.art3d.Poly3DCollection object at 0x7d7b049c5c30>)
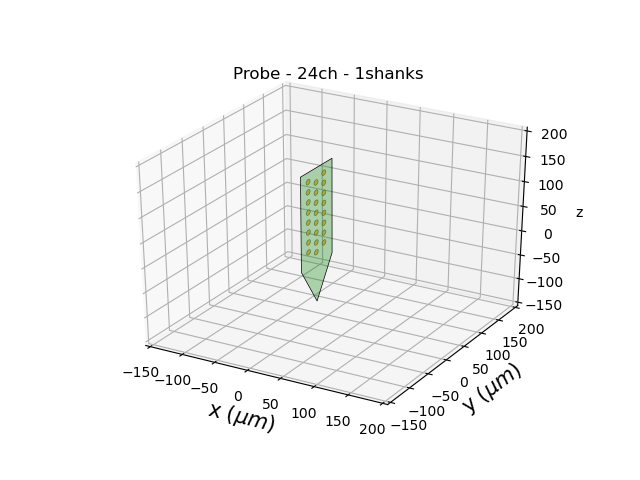
We can create another probe lying on another plane:
other_3d = probe_2d.to_3d(axes='yz')
plot_probe(other_3d)
(<mpl_toolkits.mplot3d.art3d.Poly3DCollection object at 0x7d7b0482ea10>, <mpl_toolkits.mplot3d.art3d.Poly3DCollection object at 0x7d7b0482e8c0>)
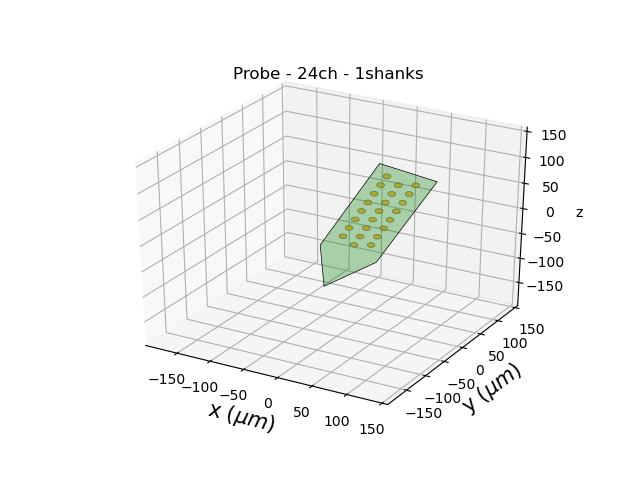
Probe can be moved and rotated in 3d:
probe_3d.move([0, 30, -50])
probe_3d.rotate(theta=35, center=[0, 0, 0], axis=[0, 1, 1])

plot_probe(probe_3d)

plt.show()
Total running time of the script: (0 minutes 0.324 seconds)