Note
Go to the end to download the full example code.
Generate a Probe from scratch
This example generates a probe from scratch.
import numpy as np
import matplotlib.pyplot as plt

from probeinterface import Probe
from probeinterface.plotting import plot_probe
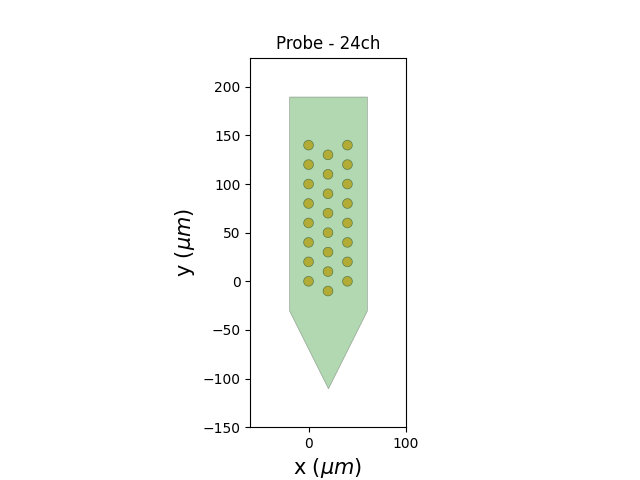
First, let’s create dummy positions for a 24-contact probe
n = 24
positions = np.zeros((n, 2))
for i in range(n):
    x = i // 8
    y = i % 8
    positions[i] = x, y
positions *= 20
positions[8:16, 1] -= 10
Now we can create a Probe object and set the position and shape of each contact
The ndim argument indicates that the contact is 2d, so the positions have a (n_elec, 2) shape. We can also define a 3d probe with ndim=3 and positions will have a (n_elec, 3) shape.
Note: shapes and shape_params could be arrays as well, indicating the shape for each contact separately.
probe = Probe(ndim=2, si_units='um')
probe.set_contacts(positions=positions, shapes='circle', shape_params={'radius': 5})
Probe objects have fancy prints!
print(probe)
Probe - 24ch
In addition to contacts, we can create the planar contour (polygon) of the probe
polygon = [(-20, -30), (20, -110), (60, -30), (60, 190), (-20, 190)]
probe.set_planar_contour(polygon)
If pandas is installed, the Probe object can be exported as a dataframe for a simpler view:
df = probe.to_dataframe()
df
If matplotlib is installed, the Probe can also be easily plotted:
plot_probe(probe)
(<matplotlib.collections.PolyCollection object at 0x73ba9a4c6380>, <matplotlib.collections.PolyCollection object at 0x73ba9a4c6350>)
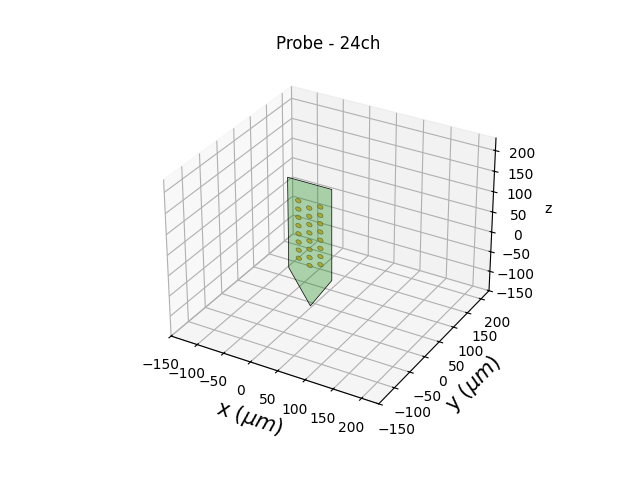
A 2d Probe can be transformed into a 3d Probe by indicating the axes on which contacts will lie (Here the ‘y’ coordinate will be 0 for all contacts):
probe_3d = probe.to_3d(axes='xz')
plot_probe(probe_3d)

plt.show()
Total running time of the script: (0 minutes 0.570 seconds)